Wildlife exclusion is the quiet work that prevents emergencies. Done right, it keeps raccoons from nesting in attics, bats out of soffits, squirrels from chewing wiring, and rats from turning a crawlspace into a breeding ground. It is not glamorous. It is methodical, physical, and unforgiving if you skip steps. As a wildlife trapper who has crawled more crawlspaces than I care to admit, I can tell you that most persistent infestations trace back to one thing: a handful of overlooked gaps that seemed too small, too high, or too awkward to bother with.
This is the foundational truth of wildlife control. If animals can get in, they will. If they cannot, they move on. That turns the craft from reactive wildlife removal to proactive wildlife exclusion, and the difference for a home or facility is measured in quiet nights and saved money.
What exclusion really means
Exclusion is the practice of sealing structures so animals cannot enter, paired with one-way devices that let already-present animals leave. It is not the same as eradication. A wildlife exterminator may be called for insects or inaccessible rodent populations, but for mammals and birds the ethical, effective approach is to exclude, then repair and harden the envelope of the building. It requires an eye for construction and the instincts of a tracker: find where they come in, understand why they chose that path, and remove the opportunity.
Every species exploits different weaknesses. Mice squeeze through a gap the width of a pencil. Norway rats will enlarge a thumb-sized hole to the size of a fist in one night. Squirrels climb like acrobats and can gnaw through softened wood. Raccoons pry, push, and rip where they sense leverage. Bats need only a half-inch slit, often at rooflines where flashing meets stone or wood. Birds nest behind loose fascia and under solar panels. Skunks and groundhogs dig below slabs and stoops, turning minor gaps into tunnels.
When you think in those terms, caulk and a can of spray foam are not enough. Exclusion relies on materials that animals cannot chew or claw apart, installed with the same attention to detail you would expect from a good roofer or mason.
The inspection mindset
I treat a building like a map with three layers: ground level and below, mid-elevation walls and penetrations, and roofline with its chaotic meeting of materials. Each layer has common failure points. I also review interior clues. Urine staining, droppings, greasy rub marks, and insulation trails tell a story. If droppings cluster near an HVAC chase, I expect a pipe or wire penetration. If I see acorn shells in a corner of the attic, squirrels are likely using a softwood edge or a chewed gable vent.
Work with a bright headlamp and a mirror. Use a camera with zoom to scan upper eaves and chimney crowns from the ground. On a single family roof, a pitch-appropriate harness is worth every buckle. For older structures, assume there are multiple entry points. Animals rarely rely on just one.
A proper inspection takes time. On a 2,000 square foot house, plan an hour to ninety minutes if you already know what to look for. Commercial buildings demand more, especially where parapet walls and rooftop units create edges and gaps.
Typical entry points by species
Patterns repeat across regions, even with local differences in architecture. Knowing where to look saves hours.
Mice and rats show up wherever utility lines penetrate, where siding meets the foundation, and at garage doors with worn seals. Brick veneer buildings often have weep holes that look tempting. Do not block drainage, but install stainless steel inserts that allow airflow and water out while stopping rodents. On concrete slabs, look at the slab-to-sill transition. A quarter-inch gap there is an open invitation.
Squirrels favor roofline vulnerabilities. Think gable vents with flimsy screens, ridge vents with plastic caps, and rotted soffit corners. They also chew through lead plumbing vent boots. I have replaced more than one mangled boot where a squirrel literally gnawed a doorway around the pipe.
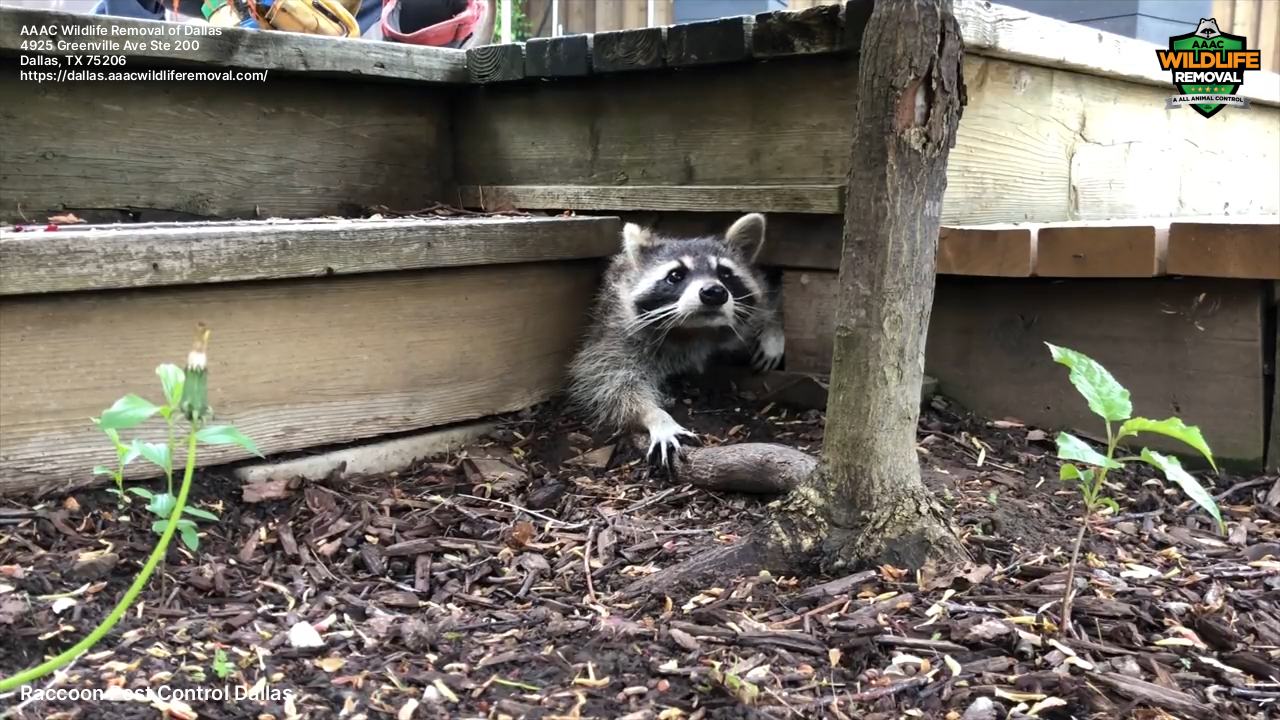
Raccoons look for leverage. Loose metal at a roof edge, a lifted shingle at a dormer, an attic fan shroud that flexes. They will turn a small flex into a 6-inch hole in minutes. They also pull at attic fan louvers and cheap soffit panels near tree branches.
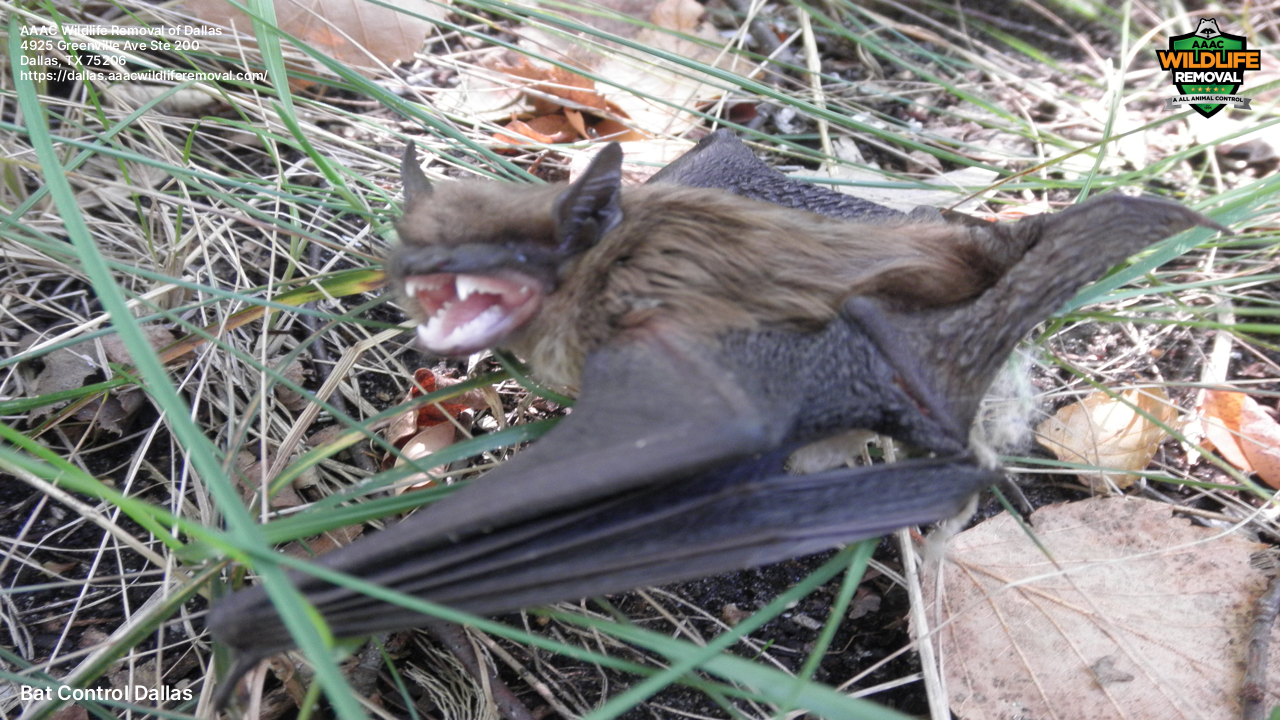
Bats are wind-driven opportunists. They slide into narrow slots, especially where fascia meets masonry. Look for smooth, oily staining along a tight seam and tiny droppings below. Bats can use a slit no thicker than your pinky finger.
Birds target dryer vents, attic fans, and returns behind loose siding. Starling and sparrow nests pack vents with tinder. When I find twigs pouring out of a louver, I expect a multi-generational nest extending several feet inside.
Skunks, groundhogs, and foxes prefer gaps under decks, sheds, and stoops. If you can slide a hand under a landing, so can a skunk. They will dig to expand that run unless you install a buried footer of mesh.
Tools and materials that hold up
There is a difference between sealing air leaks for energy efficiency and sealing animal entry. For wildlife exclusion, choose materials that resist gnawing, prying, UV, and moisture.
I rely on stainless steel and galvanized metal for any gap larger than a pencil. For chases and complex shapes, a hardware cloth made of stainless steel with a wire diameter of 0.023 to 0.035 inches is a workhorse. Quarter-inch hardware cloth covers almost every mammal case. For rodents, fine stainless steel mesh combined with backer material is best.
High-quality sealants matter. Polyurethane sealants adhere to masonry, wood, and metal and remain flexible. Hybrid polymer sealants perform similarly with less odor and faster cure. Silicone has its place for high-heat areas around flues but is not gnaw resistant on its own. Spray foam is not a stand-alone barrier. Use it only as a backing inside a cavity behind mesh or metal. Animals chew foam like popcorn.
For pipes, vents, and irregular shapes, stainless steel wool or copper mesh works as a backer. Avoid common steel wool, which rusts quickly, stains, and falls apart. Pair the mesh with sealant to lock it in place.
At rooflines, flashing repairs with 26 to 28 gauge galvanized sheet or equivalent aluminum hold up. Where corrosion from coastal air or dissimilar metals might bite, stainless or powder coated material earns its cost.
For door sweeps and thresholds, invest in commercial-grade sweeps with stainless inserts or brush seals rated for rodents. For garage doors, look at the bottom seal and the side tracks. Rodents climb into the U-channel along the jambs unless you cap the open cavity.
When working under decks and sheds, trench and install a dig barrier. I prefer a 16-gauge galvanized hardware cloth or welded wire, buried 12 to 18 inches deep and bent outward in an L to discourage digging. If soil is rocky or shallow, anchor the skirt to concrete with masonry fasteners and run the L outward on the surface, pinned and covered with gravel.
Season and lifecycle timing
Exclusion done without regard to animal breeding cycles can create ethical and legal problems. Squirrels typically have litters twice a year, often late winter and late spring. Raccoons have kits in late winter to early spring. Bats form maternity colonies in late spring through mid-summer. Many jurisdictions protect bats during maternity season, restricting eviction until pups can fly. Before sealing a suspected maternity site, listen for high-pitched chatter and look for signs of nursing females.
When schedules and laws allow, install one-way devices appropriate to the species and leave them in place long enough for all animals to exit. Then remove and permanently seal. I have returned to jobs where a rushed seal trapped young and led to dead animals in walls. The smell and aftermath cost the client more than the original work.
How pros structure an exclusion job
Every wildlife control operator has a rhythm. Mine revolves around containment, clearance, and hardening, in that order.
Containment means setting the boundary. I begin by closing or screening all obvious holes that are not primary travel routes, using materials animals cannot immediately defeat. This narrows their movement. For the known main entry, I install a one-way device: a door or valve that lets them leave but not return. For bats, that may be a cone or netting flap; for squirrels or rats, a wire-framed door attached to the opening. I then watch for 48 to 72 hours, verifying exit patterns with trail cameras or simple flour tracking at the threshold.
Clearance includes interior work. I reduce attractants and pathways. In an attic, that might mean trimming back insulation tunnels and removing cached food. In a crawlspace, it often means deploying traps around one-way devices to handle stubborn individuals. If active trapping violates local regulations for a given species, I adjust, but the principle stands: you clear the interior before you lock the door.
Hardening is the final lap. Once the building goes quiet and the devices show no new exit marks, I remove the devices and install permanent seals. That includes repairing wood, replacing vents with wildlife-rated models, and upgrading vulnerable edges that were not technically entry points yet. A good exclusion looks boring when finished. Hardware vanishes into trim. Seals are clean and paintable. Nothing rattles when you push on it.
Where spray foam and caulk go wrong
One of the most common callbacks happens after someone attempted a do-it-yourself fix with a can of foam. Foam has a role as a backer for air sealing, but it does not stop teeth or claws. Rodents sense the give. They chew through in minutes and often expand the hole in the process. If I see yellowed foam squirted around a pipe or between siding and foundation, I plan to cut it out, stuff the cavity with stainless mesh, then cap it with metal or coat it with a thick bead of polyurethane sealant, tooled tight to both surfaces.
Caulk alone fails in dynamic joints like roof-to-wall connections and long seams where expansion and contraction occur. It separates in seasonal cycles and leaves a hairline crack that bats or insects exploit. When a seal must span a gap wider than a quarter inch, back it first, then bridge with rigid material and seal the edges.
Balancing airflow, drainage, and wildlife control
A building needs to breathe. Soffit vents, ridge vents, and weep systems exist for moisture control and durability. Poorly executed exclusion often blocks airflow and creates new problems: mold in attics, wet sheathing, peeling paint, or frost in cold climates.
A professional wildlife trapper who cares about outcomes respects these systems. If a gable vent faces squirrel pressure, I replace the flimsy screen behind the louver with 16 to 18 gauge expanded metal or 0.5 inch hardware cloth mounted on the interior frame, not slapped on the exterior where water and debris collect. For ridge vents, I choose wildlife-rated ridge products or retrofit with continuous pest-proof baffles that maintain venting. For brick weeps, I insert corrosion-proof rodent guards that preserve drainage paths.
Similarly, dryer vents and bath fan terminations must expel moisture freely. The fix is a rigid, louvered or dampered hood with a bird and rodent guard designed for airflow. Avoid tight mesh over dryer vents, which traps lint and becomes a fire hazard. Use a purpose-built cover with removable guard for cleaning.
Working at height and staying safe
Ladders and roofs are where complacency bites. I have seen experienced technicians rush, skip the stabilizer, and end up with a broken wrist or worse. Use a ladder long enough to extend three feet above the landing. Tie off or have a spotter. On steep roofs, use a harness with a ridge anchor and rope grab. Lightweight roof brackets and planks turn a sketchy edge into a workable platform. None of this slows you down after you make it routine. It lets you do clean work at the exact spot where animals find leverage.
On the ground, crawlspaces harbor hazards. Wear a respirator when disturbing insulation with droppings. Hantavirus risk is real in some regions. Bat guano accumulations require caution and often a remediation step before exclusion. If you are unsure, bring in a wildlife control professional with the right protective gear and cleanup protocol.
Residential case notes from the field
A brick colonial had rats in the basement ceiling. The homeowner patched a foundation gap with mortar three times, and three times the patch popped out. From the outside, nothing obvious showed. Inside, I noticed rat grease marks along the beam near the sill plate. A closer look at the sill revealed daylight at two plumbing penetrations. The pipes ran through a brick veneer cavity, and the rats used the open bottom of the cavity to reach the holes. The fix involved removing a few courses of the basement ceiling, packing stainless mesh around the pipes, sealing with polyurethane, and installing stainless weep inserts along the problem wall. No more scrabbling in the night, and no more mystery mortar failures.
Another job involved bats entering through a half-inch gap where the stone chimney met the fascia. From the ground, it looked sealed, but the stain patterns told the truth. We set one-way bat cones at two obvious routes, netted a third tight seam, and left them for a week, monitoring guano below. After the last warm nights quieted, we sealed the seams with backer rod pushed deep, then a high-elongation sealant that tolerates seasonal movement. We also upgraded a flimsy attic fan shroud that would have become the next path. The chimney will move slightly with temperature, and the flexible seal had to move with it. Five years later, the homeowners still send a holiday note.
A final example: a deck with skunk odor in late winter. The skunk found about a two-inch gap between the soil and the bottom of the rim board and expanded it. The temptation is to toss gravel in the gap. That buys days. The right fix was to trench around the deck, set a 24-inch strip of 16-gauge galvanized mesh vertically, bend six inches outward into an L at the bottom, backfill, and staple the top to the rim board. The skunk dug in three spots, hit the L, gave up, and left. We added a discrete gate on one side for the homeowner to retrieve dropped items and for future inspections.
Managing expectations and budgets
Exclusion pricing varies with complexity, hazard, and finish work. Sealing a handful of low penetrations on a ranch home might cost a few hundred dollars. A full roofline hardening with lift equipment on a three-story structure can run into the thousands, especially if carpentry repairs are involved. The most frustrating situations build up after repeated cheap fixes. When I quote a job where previous work relied on foam and flimsy screens, I factor in removal. Clean substrate means better adhesion and longevity.
Clients often ask if trapping alone will solve the issue. Short term, maybe. Long term, never. Wildlife removal without exclusion invites new animals to the same shelter and food source. The most cost-effective path is a full exclusion plan, sometimes staged in phases if budget requires. Start with the main entry, then work outward to secondary vulnerabilities. Good communication matters. I show photos, explain materials, and point out trade-offs. Paint-matched metal looks better than raw galvanized; stainless lasts longer near the coast; some vents restrict airflow less than others. These choices belong to the owner when cost and aesthetics intersect.
When to call a pro
Many homeowners can seal a pipe penetration or install a vent cover. The line between DIY and professional work usually appears at height, in complex roofs, or when protected species are involved. If you suspect bats, consult a licensed wildlife control operator familiar with local regulations. If raccoons are nesting with young, you need timing and a humane plan. If an attic shows heavy contamination, remediation becomes part of the job.
A seasoned wildlife exterminator is not just a trap setter. The best are part roofer, part carpenter, part detective. Ask to see their material choices. If they reach for spray foam and a stapled screen where a squirrel chewed through fascia, you will be calling again. If they talk about trench depth and metal gauge for a deck skirt, you are on the right track.
A simple exterior loop you can do today
One quick habit prevents many headaches: the once-a-season perimeter walk. Pick a dry day with good light. Start at one corner and move clockwise, then scan the roofline from across the street or with binoculars. Look for shifted soffit panels, dark rub marks on siding near utility lines, daylight under doors, and chew marks near corners. Check that dryer and bath vents flap freely and are not buried in lint and bird straw. Note any area where wood looks soft or paint peels faster than the rest, since moisture damage invites chewing. If you see droppings on sills or along foundation ledges, follow them to a nearby gap. Take photos and label them. This gives a wildlife control professional a head start and often trims the billable time.
Here is a tight checklist you can keep:
- Replace torn door sweeps and adjust thresholds so light does not show. Cap open pipe chases and wire penetrations with stainless mesh and sealant. Upgrade flimsy gable and attic fan screens to wildlife-rated metal. Trim back tree limbs at least 8 to 10 feet from roof edges to reduce launch points. Install a proper dig barrier around decks and sheds if you notice burrows.
Materials that fail, and what to use instead
Another quick comparison helps avoid common mistakes:
- Standard plastic vent covers vs wildlife-rated metal hoods: plastic cracks in UV and cold, animals pry them open. Choose heavy-gauge metal with a secure damper and removable guard. Steel wool vs stainless or copper mesh: steel wool rusts and stains siding. Use stainless or copper mesh packed tightly with sealant. Thin window screen vs hardware cloth or expanded metal: window screen rips, squirrels bite through it in minutes. Use 0.5 inch hardware cloth or expanded metal mounted on solid framing. Caulk-only seals on gaps larger than a pencil vs backer and metal: caulk shrinks and fails in movement joints. Back with mesh, bridge with sheet metal, then seal edges. Surface gravel to stop digging vs buried L-footer: animals move gravel aside. Install a buried mesh barrier 12 to 18 inches deep with an outward L.
The finish line that does not look like one
Quality exclusion disappears into the architecture. After all the ladders are down and the tools packed, the home should not bristle with obvious cages and shiny plates. Paint the metal to match trim. Use colored sealants where visible. Fasten edges cleanly to avoid oil-canning and rattles in the wind. https://cesarbizy083.yousher.com/pest-control-vs-wildlife-control-what-s-the-difference Confirm that mechanical systems vent without restriction. A month later, the only sign of your work should be the absence of scratching at night and a crisp, dry attic.
Wildlife exclusion is one part craftsmanship and one part discipline. The craft is in the cuts, bends, and bead lines that make a barrier both strong and invisible. The discipline is in never leaving a maybe-gap for later. Animals only need one. When you adopt that mindset, you stop chasing noises and start creating quiet. That is the real goal of wildlife control, and it lasts a lot longer than the set-and-pray cycle of traps without repairs.
If you remember nothing else, remember this: build for teeth, claws, and weather, not just for air. Seal like the animal is watching you work, because in my experience, they often are.